Bulletin board systems have been around longer than most of us can remember. Some were not even born yet. Nevertheless, when most people didn’t even had a computer in their home, there were pioneers that were allowing other individuals to dial into their computer with only a phone line and a modem. The bulletin board software people they ran would crudely resemble the modern day website, file hosting, and email service. These boards allowed people to view current news, read content, download software, share artwork, chat in real time and even send mail back and forth before regular email had even become popularized. You could even play multi player online gaming.
As popularity grew, the operator’s (sysops) of these boards created bigger systems. But more hardware was required. As only one connection could be made for each modem at the time, these sysops added more and more modems and accompanying phone lines to allow more users access their BBS. To combat long distance call prices, these individuals created the FidoNet. The network transferred data by distributing through local distance phone calls passing information on to farther locations without the need for long distance calling.
By the time that AOL, Prodigy and CompuServe came around in the early 1990s the BBS operators eventually stop providing their services moving their content to modern services. With the modern internet, eventually there was no more need to host these boards. However, there are still hobbyists that have been hosting their BBS since that time for people to still visit.
Whether you missed the technology or want to take a trip down memory lane, follow along to learn how to install a modern day BBS on the Google cloud for pennies a month. We will be using Synchronet for our BBS software. Synchronet creates virtual switch connections so we don’t have to worry about modems like we used to. We can just install it on a vanilla Ubuntu Installation and start accepting members to our board right away.
Setup a Google Cloud Account
Head to https://cloud.google.com/ and create a new account. You can start for free.
Once you have an account, create your first project. Then we can create our VM for the BBS.
Creating our Virtual Machine
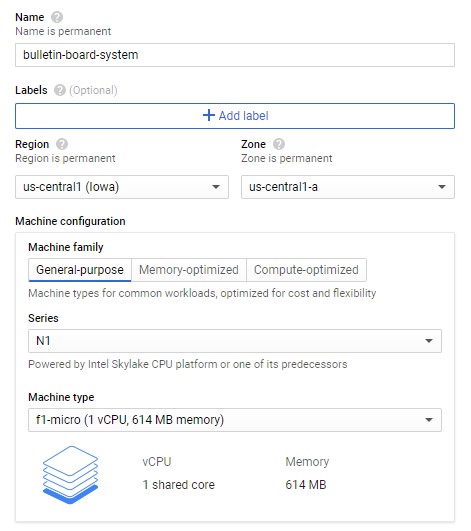
Go to Compute Engine -> VM instances, click “Create Instance“.

Name your Virtual Machine and select “f1-micro” for the Machine type.
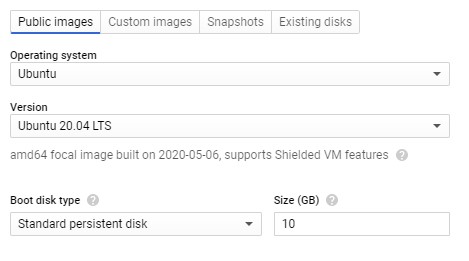
Click “Change“, to change your Boot Disk to Ubuntu 20.04 Long Term Support.
Select Ubuntu and keep the Boot Disk Size at 10GB since a BBS doesn’t take up that much space.
Do not allow any HTTP/HTTPS traffic.
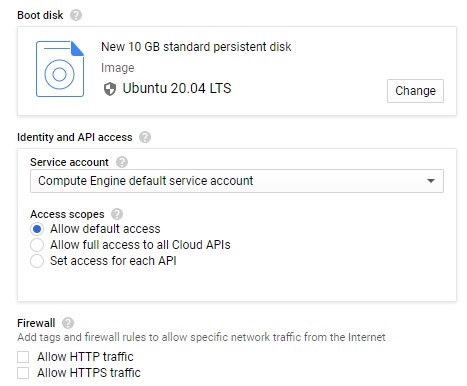
Then click “Create“.
Once it is online, login to your VM through SSH.
Google provides you with the SSH dropdown to select your preferred way to connect.

Update the new system and grab our prerequisites
Although this is a fresh install, let’s run a system update anyways.
sudo apt-get update && sudo apt-get upgrade && sudo apt-get dist-upgradeWe will need to install some pre-requisite packages.
sudo apt-get install make gcc g++ linux-libc-dev libncurses-dev libnspr4-dev patch python perl cvs libcap-dev gdb zip unzipCreate new user to run Synchronet
Create a specific user to run Synchronet and handle permissions. Then login.
adduser <NewUser>
# Add password and user info
usermod -aG sudo sbbs
su -l <NewUser>
Make the installation directory and cd to the folder.
mkdir /home/<NewUser>/sbbs
cd /sbbs
sudo ln -s /home/<NewUser>/sbbs /
Download the files with wget.
wget 'http://cvs.synchro.net/cgi-bin/viewcvs.cgi/*checkout*/install/GNUmakefile'Time to build.
Make the file with DOSEMU support so we can run DOS doors later on. Then check release file.
make install SYMLINK=1 USE_DOSEMU=1
cd ctrl
ll ../exec/sbbs
Set the Synchronet environment variable.
Then use vim to edit the <NewUser> group by adding root user.
export SBBSCTRL=/sbbs/ctrl
echo $SBBSCTRL
sudo vim /etc/group
# at the end of the file modify to
# <NewUser>:x:1003:root
Configure with scfg.
/sbbs/exec/scfg
In the main menu, go to System, and set your System Configurations.
Enter BBS Name, location, and operator password. Then you can save changes and exit with ESC.
We also need to edit the sbbs.ini file. This allows for group permissions for other members of <NewUser> group.
vim /home/<NewUser>/sbbs/ctrl/sbbs.ini
# type / [UNIX] to search for the [UNIX] hit enter
# change ;User = admin to ;User = <NewUser>
# also change umask = 077 to umask 007
# Hit ESC, type :wq and enter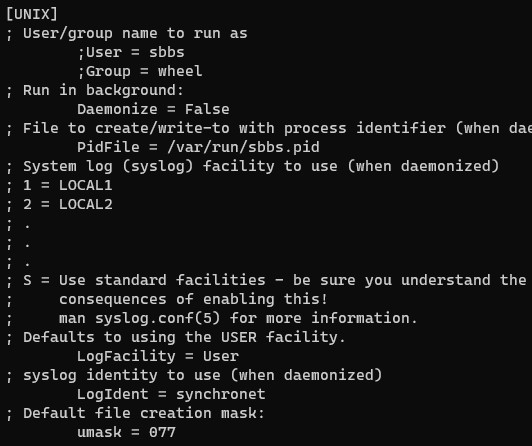
Now we can run Synchronet in console mode to see if everthing worked.
sudo -E /sbbs/exec/sbbs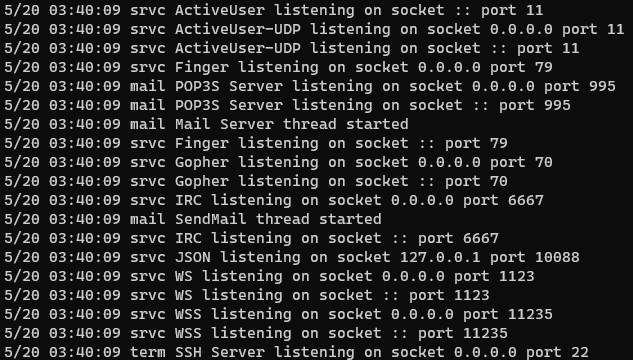
If all ports are listening your BBS is running properly.
Setting up our first BBS user
Telnet into our local system with a new shell to setup our first user.
telnet localhost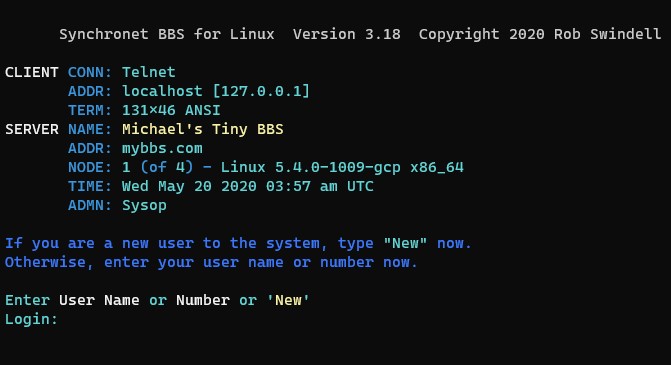
Enter “New” and create your first Sysop user.
Re-log in and follow the prompts to the Main Menu.
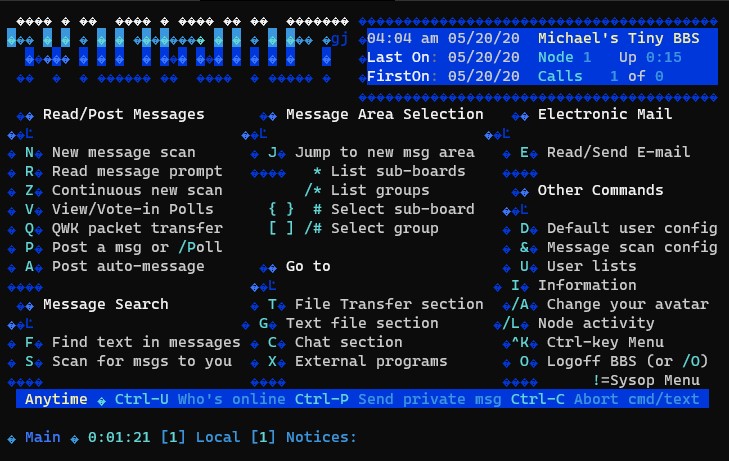
Allowing remote access
Now that the BBS service is running we need to create a Telnet firewall rule to allow port 23 on our new VM.
Go to VPC Network -> Firewall Rules, and “Create Firewall Rule“.

Your new rule should look like this upon saving.
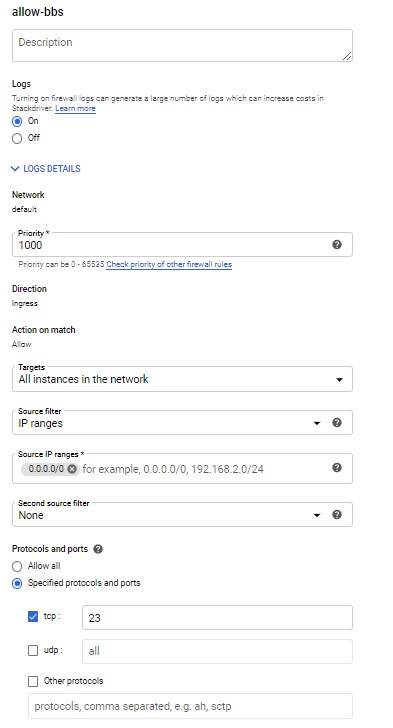
Now we can Telnet from our own device instead of SSH to our VM’s BBS service.
telnet <IP-ADDRESS-OF-VM>Setting up Daemon Mode
Enter the following to setup the daemon mode.
cd /etc/init.d
wget http://cvs.synchro.net/cgi-bin/viewcvs.cgi/*checkout*/install/init.d/sbbs.debian
mv sbbs.debian sbbs
chmod +x sbbs
/etc/init.d/sbbs start
Now your bulletin board system should start at boot up.
Stay tuned as there will be upcoming posts on how to configure file sharing, game doors, ANSI art, email and more.
Comments are closed, but trackbacks and pingbacks are open.